 Pin
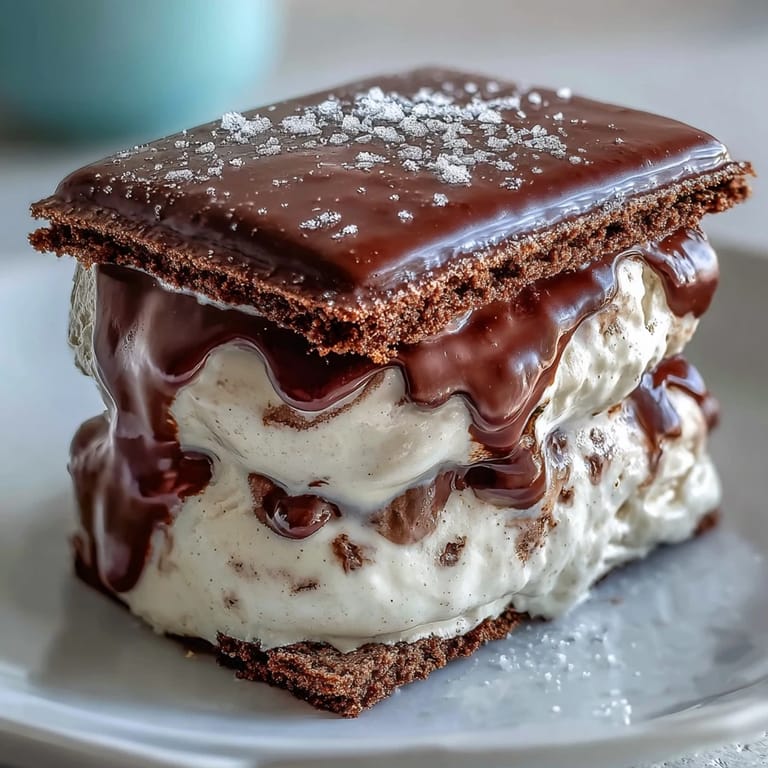
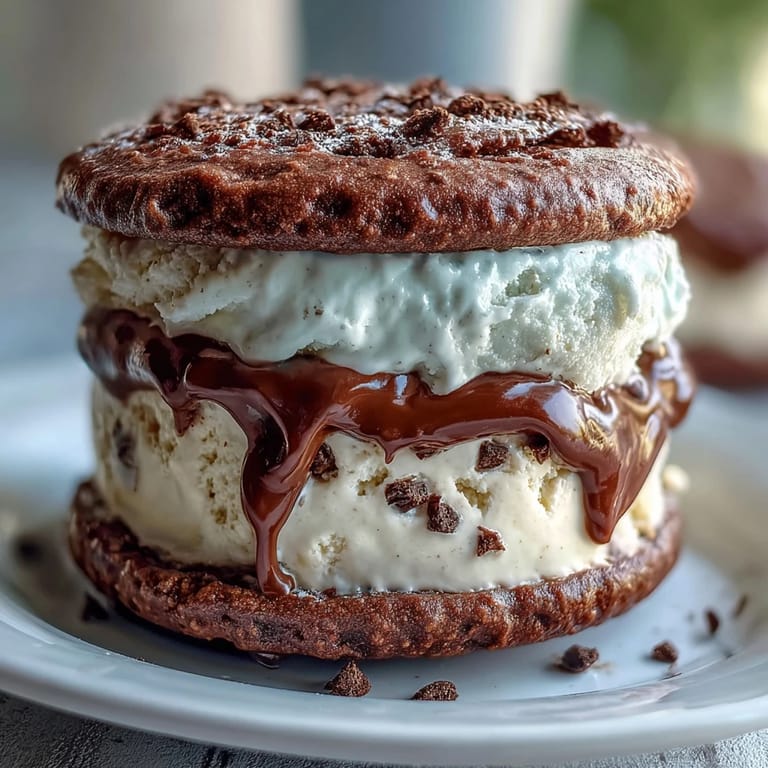
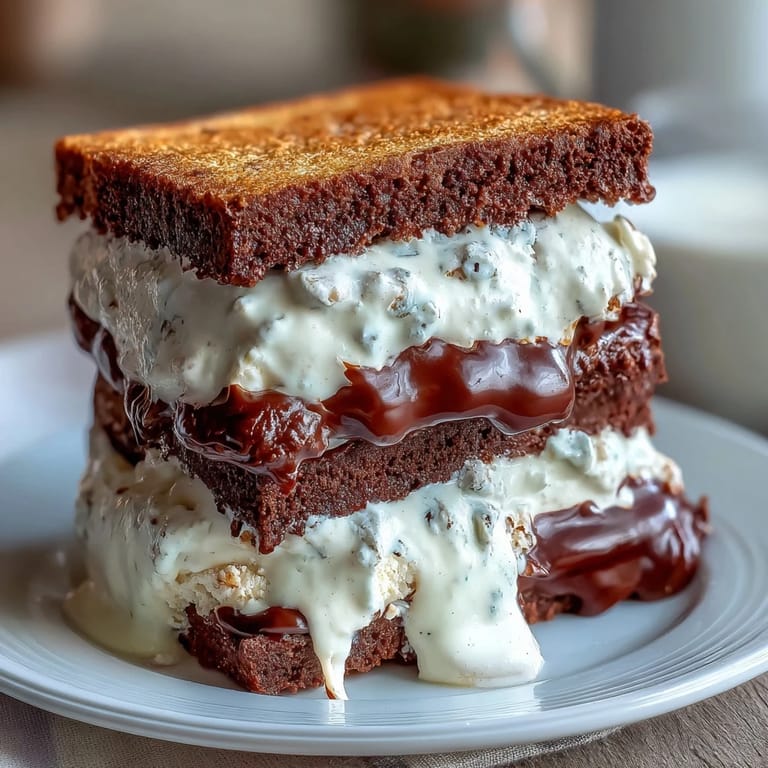
Pin There's something about holding a cold ice cream sandwich on a summer afternoon that makes everything feel manageable. I discovered these vanilla bean frappuccino ice cream sandwiches by accident, actually—I'd made espresso cookies for a dinner party and had leftover vanilla bean ice cream from another project, and someone joked that together they tasted exactly like that beloved coffee drink. The joke stuck, and now I make them whenever I need to impress people or justify an afternoon in the kitchen.
Last summer, my nephew asked if we could make "those coffee ice cream things" after tasting one at a friend's house. We stood in the kitchen on a sweltering Saturday, and he got completely focused on cutting perfect circles with the cookie cutter—barely spoke for an hour, just concentrated on his task. When we bit into the first sandwich and he closed his eyes, I realized this wasn't just about the dessert anymore.
Ingredients
- Unsalted butter (1 cup, softened): Use room-temperature butter so your dough creams properly without lumps, which makes the cookies tender rather than dense.
- Brown sugar and granulated sugar (1 cup plus 1/2 cup combined): The mix of brown and white gives the cookies depth—the brown sugar adds moisture and slight caramel notes that espresso loves.
- Large eggs (2): Room temperature eggs blend into the butter more smoothly, creating a better texture throughout the dough.
- Vanilla extract (2 tsp): Don't skip this; it balances the intensity of the espresso and cocoa without making anything taste sweet.
- All-purpose flour (2 1/2 cups): Measure by spooning into your cup and leveling off, or better yet, weigh it if you can—compacted flour changes everything.
- Unsweetened cocoa powder (1/2 cup): This is what gives the cookies their richness; Dutch-processed cocoa creates deeper chocolate flavor than natural cocoa.
- Instant espresso powder (2 tbsp): Don't substitute with finely ground espresso beans; the instant powder dissolves evenly and distributes the coffee flavor throughout every bite.
- Baking soda (1 tsp) and salt (1/2 tsp): These work together to enhance flavor and help cookies spread just enough for a thin, crispy edge.
- Heavy cream (2 cups) and whole milk (1 cup): The ratio matters—whole milk adds flavor while heavy cream creates silky richness that regular cream alone won't achieve.
- Granulated sugar (3/4 cup for ice cream): This sweetens the ice cream without any gritty texture that would ruin the smooth mouthfeel.
- Vanilla bean (split, seeds scraped, or 2 tsp vanilla bean paste): Real vanilla bean seeds give specks of flavor and visual character; if you go this route, split the pod lengthwise and scrape with a knife tip.
- Pinch of salt (for ice cream): Salt amplifies vanilla flavor and prevents the ice cream from tasting one-dimensional.
Tired of Takeout? 🥡
Get 10 meals you can make faster than delivery arrives. Seriously.
One email. No spam. Unsubscribe anytime.
Instructions
- Make the ice cream base first:
- In a saucepan, combine milk, sugar, vanilla bean seeds and pod (or paste), and salt. Heat gently over medium heat until the sugar dissolves and steam rises from the surface—you'll see small bubbles forming around the edges, but stop before it boils. Remove from heat, discard the pod if using a whole bean, then stir in the heavy cream and let it cool a bit before refrigerating for at least 2 hours (or up to overnight if you have time).
- Chill the ice cream mixture thoroughly:
- This step isn't boring—it's essential for churning later. A properly cold base churns faster and creates smaller ice crystals, which means smoother ice cream.
- Churn the ice cream:
- Follow your ice cream maker's instructions; most take 20–25 minutes. Once churned, transfer the soft ice cream to a parchment-lined 9x13-inch pan and spread it about 1 inch thick, then freeze for at least 2 hours until solid enough to cut.
- Prepare your oven and preheat to 350°F (180°C):
- Line two baking sheets with parchment paper so your cookies won't stick and will brown evenly.
- Cream butter and sugars until fluffy:
- Using an electric mixer, beat the softened butter with both sugars for about 3 minutes, scraping down the bowl halfway through. The mixture should look pale and almost creamy—this incorporates air, which helps cookies rise slightly.
- Add eggs and vanilla:
- Beat in eggs one at a time, making sure each is fully incorporated before adding the next. Add vanilla extract last and mix until everything looks smooth.
- Combine dry ingredients separately:
- Whisk together flour, cocoa powder, espresso powder, baking soda, and salt in another bowl so the espresso powder distributes evenly and doesn't create clumps.
- Mix wet and dry together gently:
- Gradually add the dry mixture to the wet mixture, stirring just until combined—overworking dough creates tough cookies. Stop as soon as you don't see flour streaks.
- Roll out the dough:
- Divide dough in half and place each half between two sheets of parchment paper. Roll to about 1/4 inch thickness using a rolling pin or even a wine bottle if needed; the thickness matters because thin cookies crisp up nicely while thicker ones stay chewy.
- Cut out cookie rounds:
- Using a 3-inch round cutter, cut out 16 rounds total (you need 16 for 8 sandwiches). Place them on prepared baking sheets, leaving a little space between each one.
- Bake until set at the edges:
- Bake for 10–12 minutes; the cookies should look slightly firm around the edges but still a bit soft in the center. They continue cooking on the hot pan after you remove them, so don't overbake or they'll become brittle.
- Cool completely on a wire rack:
- This is where patience pays off—warm cookies break easily. Let them cool fully before you even think about assembling.
- Cut the ice cream into rounds:
- Remove the frozen ice cream slab from the pan and use your same 3-inch cutter to cut 8 rounds. Work quickly so the ice cream doesn't melt; you can dip the cutter in warm water between cuts to help it go through smoothly.
- Assemble your sandwiches:
- Place each ice cream round between two cookies and press gently together—this takes just a moment and creates a perfect seal. Wrap each sandwich in parchment paper (this prevents freezer burn and keeps them from sticking together).
- Final freeze:
- Freeze the assembled sandwiches for at least 1 hour before serving, though they're even better after a few hours when everything is completely solid.
 Pin
Pin My sister brought these to a potluck last month, and watching grown adults genuinely debate whether they tasted better than the coffee shop version was the kind of silly joy that reminds me why cooking for people matters. Nobody asked for the recipe that day, but three people texted me the next week asking if I could make them for a birthday celebration.
When You Don't Have an Ice Cream Maker
Freeze the chilled ice cream base in a shallow dish and stir it vigorously every 30 minutes for about 3 hours, scraping down the sides and breaking up ice crystals as they form. It takes patience and a little more elbow grease, but you absolutely can create scoopable ice cream this way. The texture won't be quite as silky as machine-churned, but it's honest work and tastes genuinely good.
Flavor Variations Worth Trying
Once you master the basic version, these sandwiches become a canvas. I've rolled the edges in crushed espresso beans, dipped them in melted dark chocolate, or even added a thin layer of salted caramel between the cookie and ice cream. The cookie base is forgiving enough that you could experiment with a splash of bourbon or Kahlúa in the ice cream, or swap the vanilla for a coffee-flavored base if you want to lean fully into the frappuccino concept.
Storage and Make-Ahead Tips
These freeze beautifully for up to two weeks wrapped individually in parchment, which means you can make them on a lazy afternoon and have fancy desserts ready whenever you need them. The cookies alone will keep in an airtight container for three days if you want to bake ahead, and the ice cream base can sit in your fridge for up to 24 hours before churning.
- Wrap each sandwich tightly in parchment paper before placing them in a freezer bag to prevent any ice crystals from forming on the surface.
- If a sandwich starts to melt slightly after serving, just pop it back in the freezer for 5 minutes and it'll firm up again.
- These are best eaten within 10 minutes of coming out of the freezer, when the ice cream is cold but not rock-hard.
 Pin
Pin Making these takes a few hours start to finish, but most of that is waiting and chilling time while you do other things. Once you taste how a homemade vanilla bean ice cream tastes nestled between chocolate-espresso cookies, store-bought versions will feel thin by comparison.
Recipe FAQ
- → How do I achieve a creamy texture in the vanilla bean ice cream?
Heat the milk, sugar, and vanilla bean gently until sugar dissolves, then chill thoroughly before churning. This helps develop smoothness and depth of flavor.
- → What gives the cookies their espresso flavor?
Instant espresso powder combined with unsweetened cocoa powder infuses the cookies with a rich, bold coffee taste that complements the vanilla ice cream.
- → Can I prepare the ice cream without a machine?
Yes, freeze the mixture in a shallow dish and stir every 30 minutes until creamy to mimic the churning process.
- → How should I store the assembled sandwiches?
Wrap them individually in parchment paper and freeze for at least one hour before serving to ensure they hold together well.
- → Any tips to add extra texture or flavor?
Roll the sandwich edges in mini chocolate chips or crushed espresso beans before freezing for added crunch and taste.